![]()
| HOME | How to Order |
|
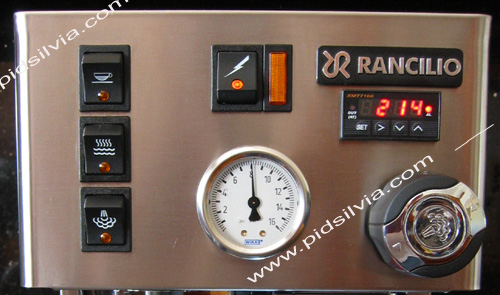
Pressure Gauge and PID Cut-out.
Click here for previous page - Or Back to How to page.
Pressure Gauge Cut-out
To make the hole for the pressure gauge, I recommend using a Knockout Hole Punch, also called Slug Buster Knockout. However, many people are use a bi-metal hole saw and Dremel tool and do fine.
Most Knockout die tools are numbered with the actual die size and the conduit pipe size they will fit. You need to look for the actual cut out size, not the conduit size.
For example, an actual die size of 1.951" (49.6mm) can be sold as 1-1/2" conduit pipe size.
The 2 inch gauge will fit in a hole with a diameter of 1.97 inch, (50mm).
The gauge actual diameter size is 1.96 inch or 49.94mm and the actual outside diameter size with lip to cover hole is 2.1 inch or 55mm.
In case of an ugly scratch. The texture of the brushed stainless steel can be carefully refinished with fine emery cloth (you will have to learn more about this).
|
|

|
One example is: Greenlee 1 1/2" Slug-Buster 1-1/2" Conduit (7211-BB-1-1/2)
1
|
|
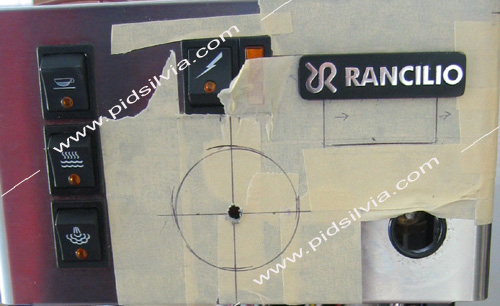
Mark the
layout.
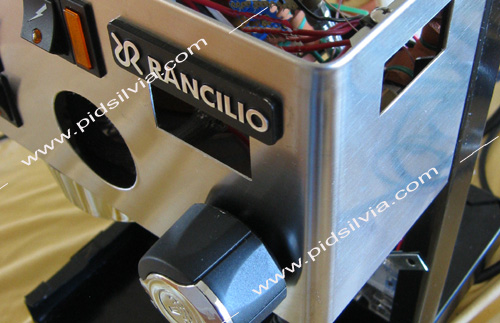
In this example, the Rancilio logo will move up so that the PID can be installed just below it. |
2
|
|
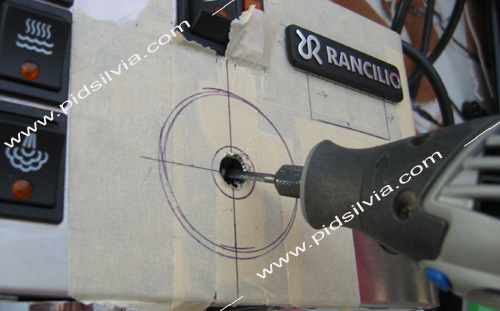
Dremel tool can be used for the center pilot hole. |
3
|
|
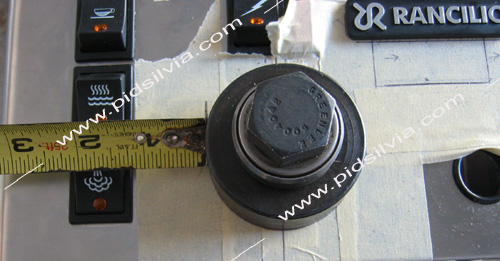
Before cutting, make sure the Knockout Die fits your layout. |
4
|
|
Dremel tool can be used for small adjustments.
Here, the Knockout Die was 49.6mm, but the gauge was 49.95mm
|
5
|
|
Small file can be used for cleaning the burr and making the final fitting. |
|
6 |
Back to Top of page. |
|
|
|
7
|
|
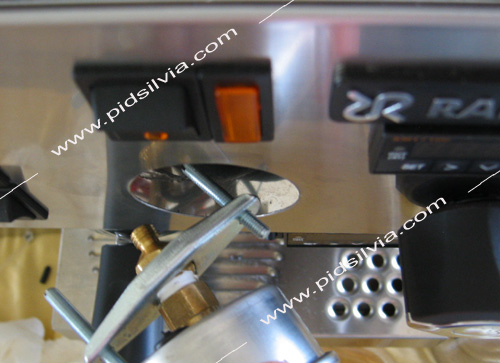
A long flathead screwdriver is helpful to tighten the U-clamp from the back.
See how the U-clamp sits on gauge. |
8
|
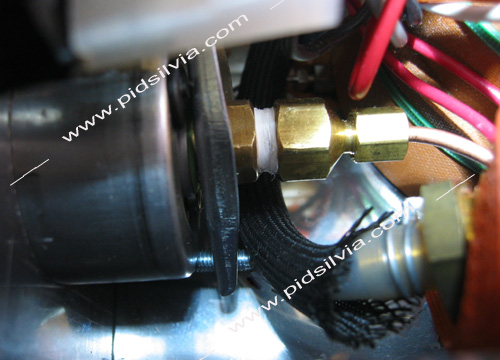
To make the connections inside the machine, you will need some small tools and patience.
Installing the gauge before installing the PID will make the job easier.
|
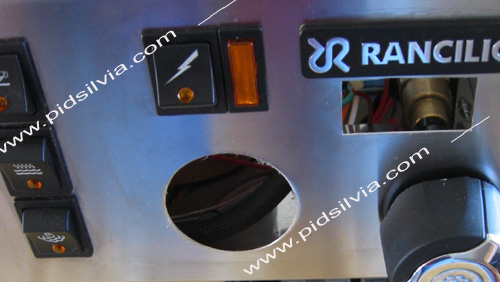
PID Cut-out. - Back to Top of page.
Internal PID install could have some problems (which I list here on this page ), so you must read the PID Set-ups page and be aware of the limitations.
With internal install you are facing a risk of the PID unit becoming dysfunctional after extreme heat as a result of steaming. After cooling down It will become functional again.
Insulation and space will help, but will not cure the problem at high usage.
9
|
|
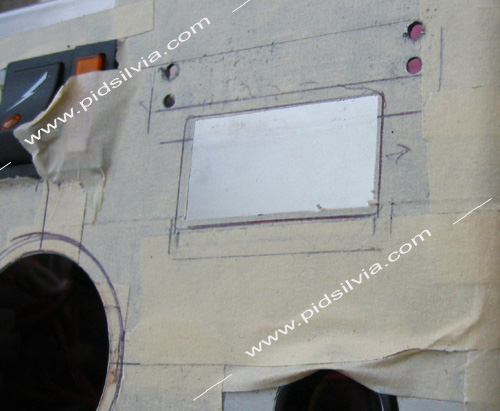
Mark the layout.
There are a few variations for the layout. Here I am showing the best layout to my opinion. Will provide template and or measurements in the future. |
10
|
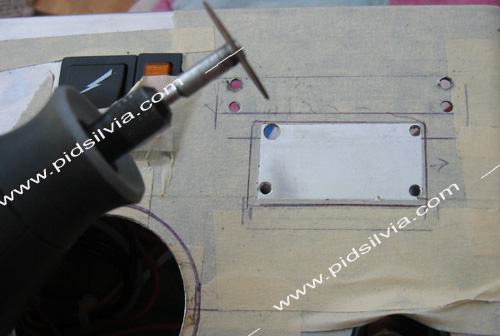
First layer of tape should be right on measurement.
The actual cutting with the Dremel tool will be smaller on the inside, so the final fit will be done by hand with file. |
11
|
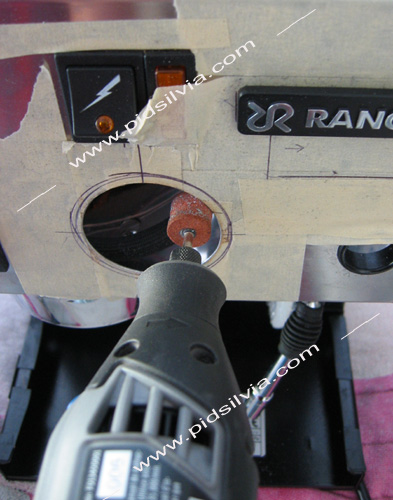
Drill at the corners of the metal to be cutout before cutting.
Cut slow, not to discolor the metal from heat. |
12
|
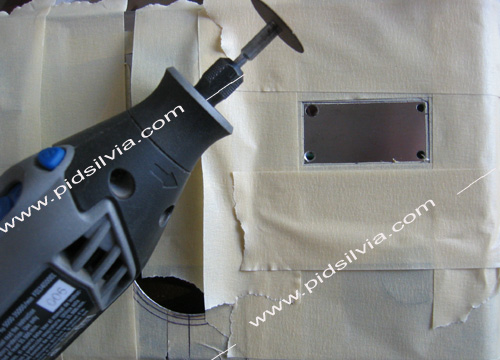
Use more protective tape around the cutout before using the Dremel tool.
You will need about 3 blades for each of the four sides if using. Dremel #409 , 15/16" Cutting Wheels. or only one wheel of reinforced Dremel #426 , 1-1/4" or one wheel of EZ456 Cutting Wheel. ( EZ406 kit ) Use dust mask and eye protection.
|
13
|
|
14 |
Back to Top of page. |
|
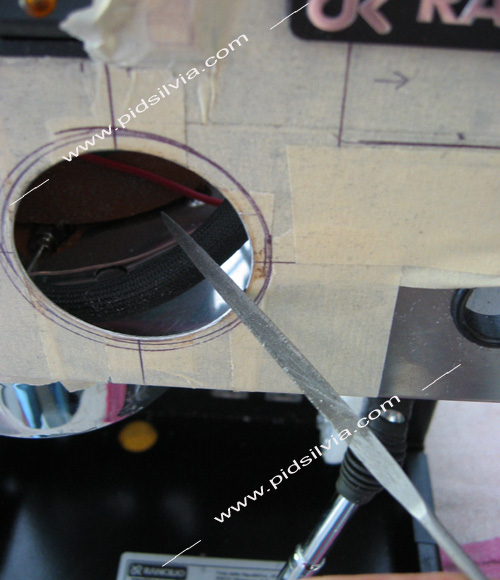
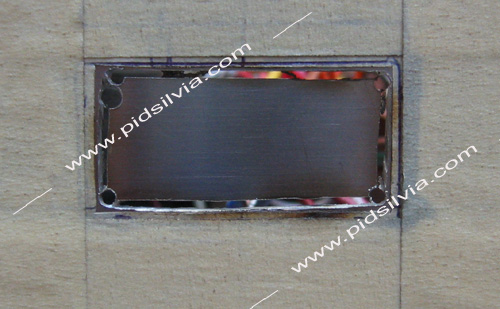
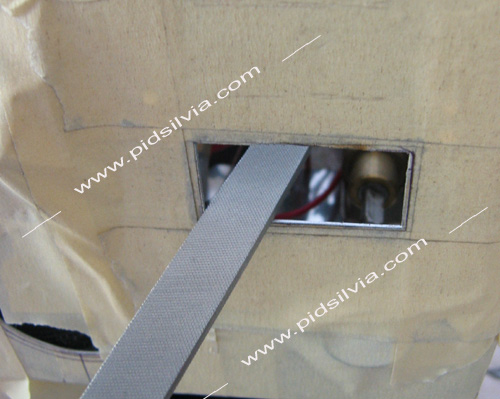
Use steel files for final fitting. |
15
|
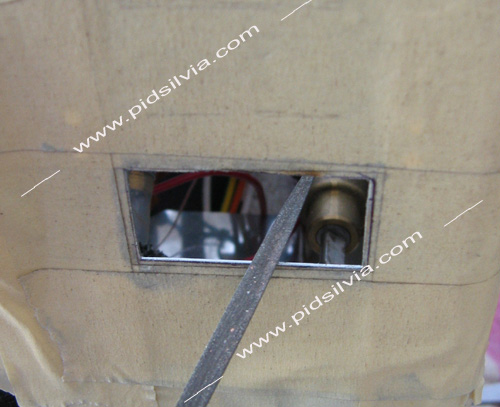
Here, a finer blade takes off the rough edge. |
16
|
17
|
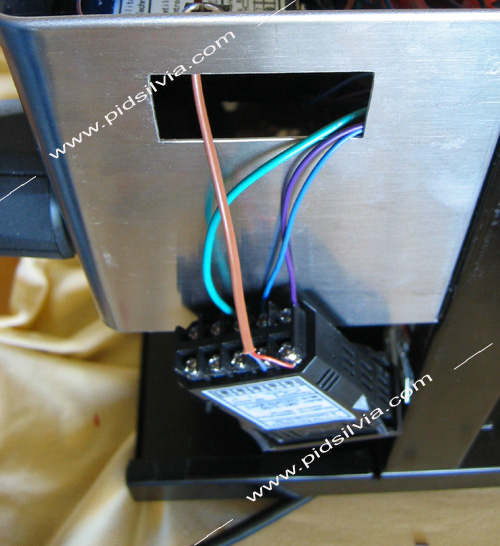
Dry fit the controller.
Pull all wires out and make all the connections out of the machine. Re-tighten all terminals once and twice before you push the controller in. |
|
18 |
Back to Top of page. |
|
DISCLAIMER:
Although I make every effort to use the best components and to provide the best information to my knowledge, the customizations are not approved by Rancilio or tested by any third party.
You are performing customizations at your own risk. You will assume full responsibility for any damage caused by this website, information or parts obtained from pidsilvia.com.
|
|